
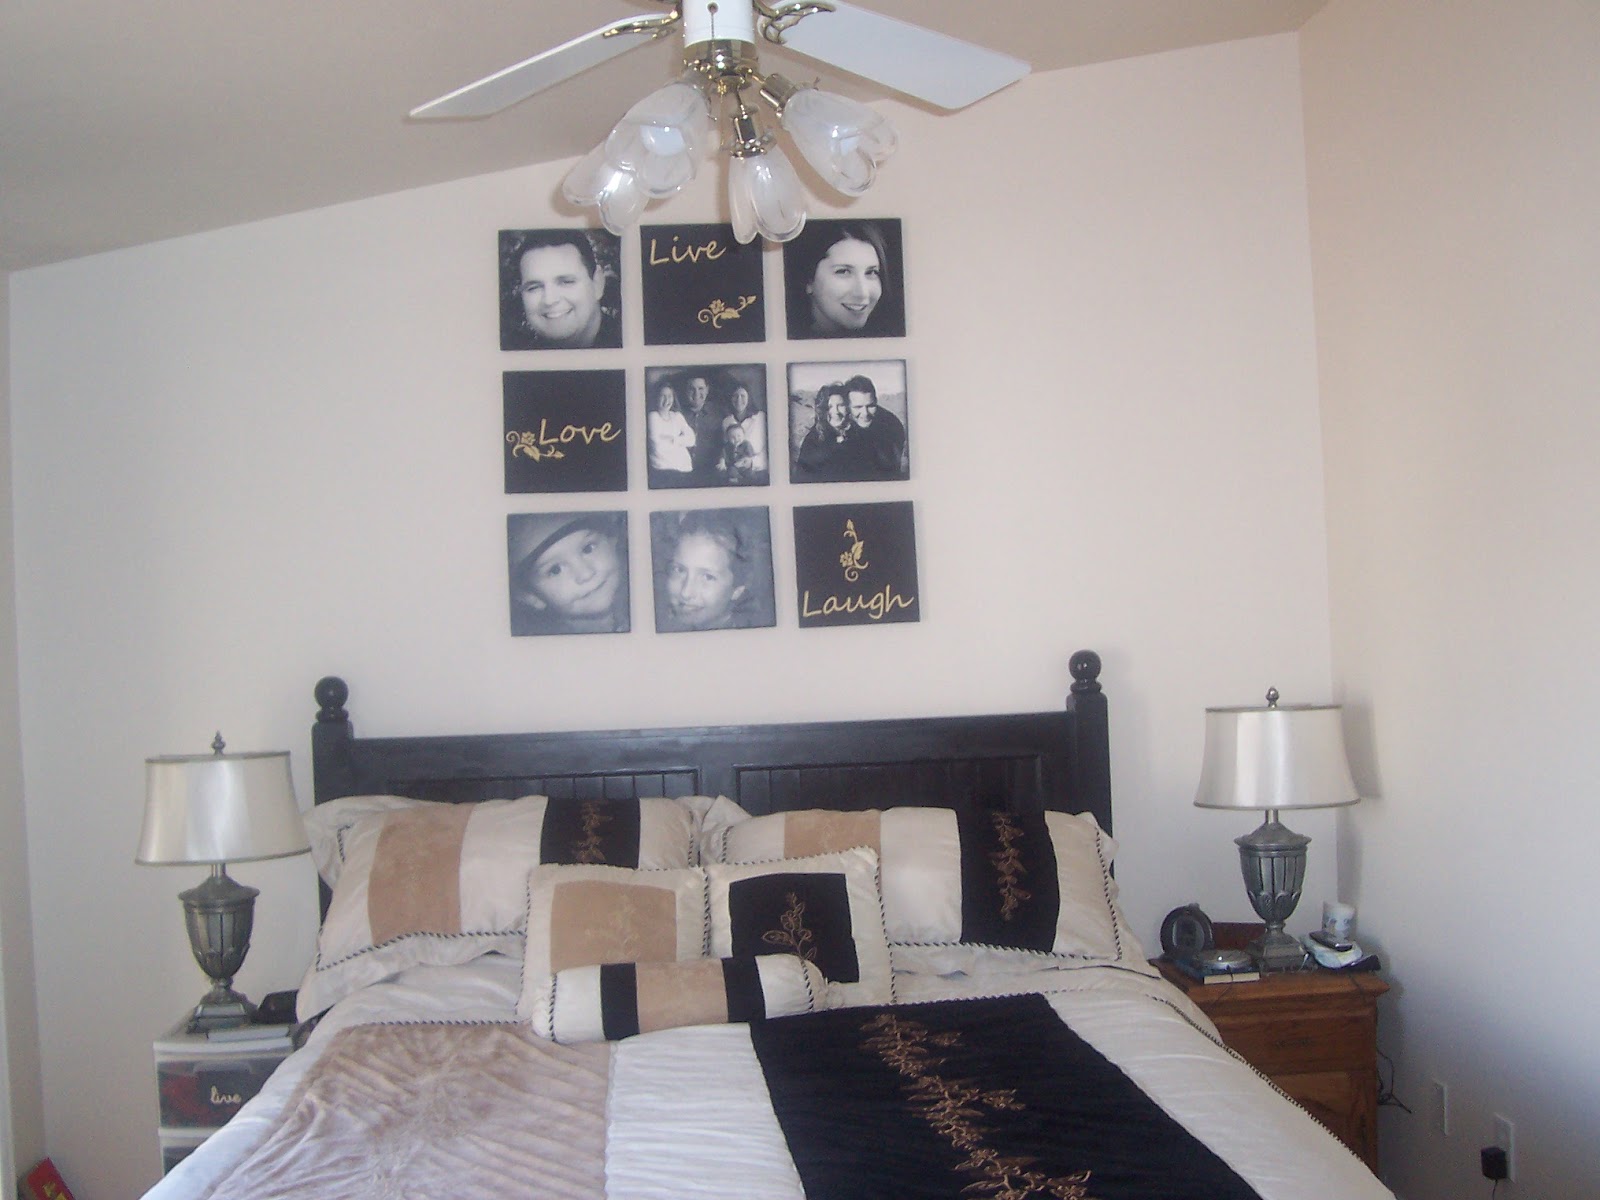


I love these pictures!! This was really an easy project. I got the Idea from a lot of different blogs on pinterest. I combined my favorites.
First I edited all the pictures just the way I wanted them, black and white, shadowed edges, and softened. I took them to the local printing store. I wanted them 12 x 12 but I had to have them printed on a page that was 12x20ish (12xsomething) of plain no frills paper or something like that. They had to re-size the pictures to allow for a 1/4 inch around each side and one side of the paper was a waste of blankness I cut off no biggie :) They only cost about 40 cents each!!
Then I went to Home Depot and bought two 24x48 pieces of insulation Styrofoam board around $8 each. I had most of one board left for a future project. I also got a small container of sample paint as dark as they could make it around $3. DO NOT USE SPRAY PAINT ON STYROFOAM IT WILL EAT IT!!! A can of spray on adhesive about $5 this will not eat the board. Other blogs warned me not to use Mod Podge it will wrinkle the paper. A spray can of Krylon Matte Finish to protect the paper (I got this from my Mom so I don't know the price.).
I had the 3 pieces of black scrapbook paper and I cut out the words and flowers with my Cricut and Vinyl that I had on hand. Tip: DO NOT BUY Cricut brand vinyl it's a rip off! I can get two 12x24 inch sheets of vinyl for $3 from my local sign and banner store in a much larger variety verses two 12x24 inch sheets of vinyl for $9 from the craft store of Cricut brand.... I have also gotten some good deals from E-bay.
Total cost minus the things I had on hand: $30 and I have supplies left over for other crafts!
The process:
1. I cut the foam in 12x12 pieces with a wood burning kit with an exacto knife blade attachment. Warning: This causes toxic fumes. I have read that others used box cutters.
2. I painted the edges of the foam and just the edges of the front and back with a small foam brush and let them dry.
3. I cut out the photos.
4. I sprayed on the spray adhesive directly to the foam. It doesn't dry completely clear so do get it on anywhere that is going to show. I carefully added the photos and scrapbook papers.
5. This is where you would put on the protective matte finish I haven't put mine on yet I just got it.
6. I let that sit over night in the garage so we didn't gag on the paint fumes.
7. I added the vinyl lettering and hung them with just small nails.
If you don't like the way your edges came out I have seen others use Ribbon instead of paint. Or covering the whole piece of Styrofoam in black fabric.
I love it!!!
Here are a few links that helped me out:
http://www.flickr.com/photos/tammywatson/4108464206/in/gallery-21611665@N04-72157625840887538/
http://alittlemcd.blogspot.com/2010_09_01_archive.html
http://crib-tales.blogspot.com/2010/03/thrifty-canvases.html
http://www.sugarbeecrafts.com/2012/01/giant-picture-tutorial.html?utm_source=feedburner&utm_medium=email&utm_campaign=Feed%253A+SugarBeeCraftsSewingRecipesCraftsPhotoTipsAndMore+%2528Sugar+Bee+Crafts%253A+sewing%252C+recipes%252C+crafts%252C+photo+tips%252C+and+more%2521%2529
Beautiful! Love the arrangement and the photos.
ReplyDeleteThanks I love it too :)
ReplyDeleteCaroline, I love your ideas, you're so creative! just love the TV tray!
ReplyDelete