Since my friends last name is short this works well. I cut out each letter with my cricut and used dollar store frames. Really easy and I think it's super cute! She said it was the perfect accent for her wall. Also made a great and cheap wedding gift.
Wednesday, August 15, 2012
Tuesday, August 14, 2012
Spray paint in the bathroom?
I found a cute kiddie wooden step stool at a yard sale. It was blue and had stickers on it. When I removed the stickers I accidentally removed some of the paint, that made it ugly. I had a garbage can from Target that was white already in there. There also was a gold colored towel bar yuck. I had a can of green spray paint left over from another project and there was green in the bathroom theme already so I put the spray paint to use. I took the towel bar apart and sprayed all 3 things outside. I cut out the turtles with my Cricut.
 |
| Who ever thought of spray painting a towel bar green? |

Antique TV Stand
We needed a stand for our large flat screen. After searching and searching we couldn't find an entertainment center we were willing to pay for that was the right size. We lucked out for next to nothing we found this great piece at a yard sale. It's an old timey TV holder that fit inside, you know the kind with cathode tubes (Google it). My Sweety re-stained it and made it lovely.

-------->
Perfect space to hide stuff

Pics of the back. There is really cool stuff written back there. Made in the USA
Shade from the Sun
I live where it's hot and I mean HOT!! Over 100 degrees is almost everyday here in the summer and we have very long summers. Our sliding glass patio door is on the south side of the house and causes lots of radiant heat. We have vertical blinds in front of it but that only helps a little. My sweet husband made me a canopy for it. There is a distinct temperature difference in my kitchen and dining area now, thanks honey!
 |
| Chain link top connector. Drilled holes straight through the sides of 2 of them. |
 |
| 1-3/8" x 10.5' pipe. Drilled holes in both ends of 2 of these to match the holes in the connectors. |
 |
| Canopy rolled out in my living room and square dowels. |
 |
| I stapled the dowels to the short ends. The edges were unfinished and we didn't want them to fray. |
 |
| My husband putting the snap grommets on. We put in several along the short ends. They are not hard to install , the package comes with instructions. |
 |
| Put in 2 eye hooks into the eave where there was a stud. At the top of the poles we put eye bolts. We tied the canopy to the eye hooks with rope. |
 |
| Canopy package |
 |
| Grommet package |
Wednesday, August 8, 2012
Kids Kitchen - Habitat for Humanity
I DID NOT do this project. I am posting this for my friends at the Habitat for Humanity Of Southwest Utah ReStore! This place is awesome! They are a home improvement thrift store. All of the proceeds from the sale of items in the store goes to Habitat for Humanity of Southwest Utah and stay in Washington County. They sell just about anything you will need for your home. From doors and windows to flooring, lighting, appliances, calking, furniture and so much more! Anyway this is a project THEY did for an auction.

 This is the Entertainment
center we started with .
The glass door HAD to go.


Primer is on.
Believe it or not we found a mini fridge door that fit the space perfect. The mini fridge was brought in for recycling.

 Picture with the door closed perfect
fit!
Another coat of paint.

 Added a cover over the hole in front of our sink area, this is when we also added the the black square stove
top.

 Checking out some wire racks we had to see if it would work. Okay as you can see from this picture I changed out the bottom wire racks so that it all matched.
 We have also added knobs on the side by the oven for potholders. In the store we have a few kitchen organizers. The top rack holds spices the bottom rack is for slotted spoons and such.

 Made a call to our local recycler, Virgin Valley Recycling. They found us the perfect phone. The burners came from a range we were tearing down for recycling!

 Added the towel rack and clip as well as the drawers. We had these drawer handles in the store, they look perfect. Added a light above the sink, non working.
Added the sink and put the doors back on the "oven" we cut it out the

 center and put plexi glass in the center. The cabinet under the fridge is a "dishwasher"
 Added glass tiles for a back splash. The range and oven knobs were from yet another range that was to be recycled. Added a shelf over the range for the dishes.
LOVE the window. Added the potholders, kitchen towels and washrag. A look at it finished inside. Putting on the finishing touches magnets on the fridge and potholders.
Tell me that apron is not to cute!!!
Added the measuring cups and spoons.
Isn't it lovely!
Thursday, June 21, 2012
Kids Picnic Table Redo
This is what the table looked like when I bought it except a little more faded. I got it from a yard sale and I hated the colors in my kitchen. I use it as a snack table for my little one. It was ugly and a little bit of a pain to clean so I spray painted it. That made it worse because any food that was stuck on would chip the paint so I wanted a better solution, and this is the result.


I washed it down and took it apart, 8 whole screws. Very easy but be careful of the plastic screw covers I broke one and had to glue it on at the end.

 Spray painted it with a really cheap plain black spray paint. I would say about a can and a half. While the paint was drying I used a staple gun to attach fabric and then vinyl covering for easy clean ups. I bought the vinyl at Walmart in the fabric department.
 Here they are all finished in no time. Just a little tricky because the edges are rounded but I muddled through. And here is a pic of after I put it all back together. He couldn't wait to use it! Now I just need to get a better rug for underneath :)
Someone else did my project!
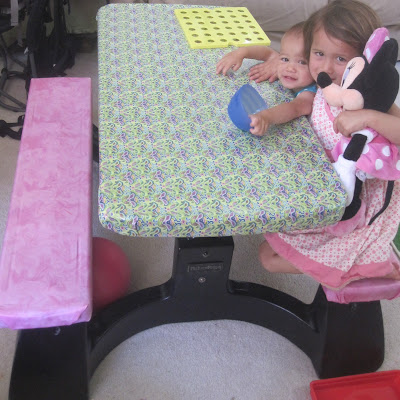
If you would like me to post a picture of your Picnic Table Redo E-mail it to me here: CarolinesCraftyCorner@yahoo.com I would love to post it!
 |
| From: Codi S. One for play one for school |
 |
| From: Cheri C wow love those colors |
 |
| From: Just Me and My Guys |
 |
| From: Happenings of the Harper Household |
 |
| From: Erica R My personal friend :) |
 |
| From: April M chevron loveliness |
 |
| Jami did a great tutorial of her own. |
 |
| From: Nicole L. Love those those polka dots |
 |
| From: Samantha so fun! |
 |
| From: Lindsey J. Fitted sheet and blue paint for Broncos Boise State napkins for the design,so thrifty! |
 |
| From: The family in apartment 5 |
 |
| From: Amy Lee |
 |
| From: Chelsea H. Awesome table! |
 |
| From: Kasi B Stunning! |
 |
| From: Amber Great Job! |
 |
| From: Kelly K. This is ADORABLE! |
 |
| From : Leanne's creative creations |
 |
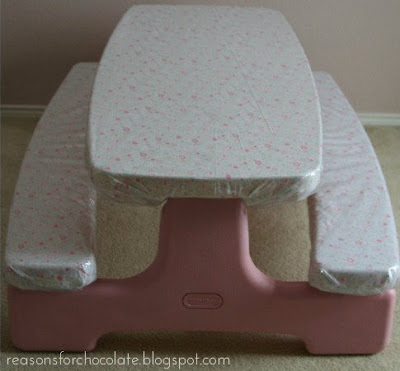
| From: Patty at Reasons for Chocolate |
 |
| From: Ryleigh's Mom, very designer looking. |
 |
| From: Angela B. Oh so cute! |
 |
| From: Khrystina R. I LOVE the Skulls and Pink!!! |
 |
| From: Tasha M. Apples to go with her kitchen. |
 |
| From: Danielle Amazing transformation! |
.jpeg) |
| From: Chantelle fun fun fun! |
 |
| From: Ana F. Love the colors. |
 |
| From: Andrea E. sweet and simple |
 |
| From: Anonymous Pink and Camo |
 |
| From: Beth B loving those colors! |
 |
| From: Debra nautically awesome! |
 |
| From: Sara C blue paisleys very calming |
 |
| From: Codi H lovely in leather |
 |
| From: Marie E see through lace vinyl over top of color fabric love it! |
 |
| From: Sarah J fun in the city! |
 |
| From: Debrah W Oh my heck that's cute! |
 |
| From: Lori SN I love The Little Mermaid great job! |
 |
| From: Jennifer G she tried to paint hers too and almost threw it out |
Subscribe to:
Comments (Atom)


