Wednesday, June 20, 2012

My pretty side table

4. Sissors
5. Yard stick
6.  Foam paint brush
7. Vinyl covering
8. Black paint (not shown)
Here are the supplies I used:
1. Cute fabric of choice
2. Mod podge
3.  Staple gun


This is the boring plain wood TV tray
that we got from the thrift store
I measured and cut the fabric and
stapled it to the bottom. I mod podged
it several times (if I knew I was going to
cover it with vinyl I would have skipped
this step)  


I painted the leggs
Covered it with vinyl and
stapled it with the staple gun


Ta-da here is my beautiful side table

TutusandTeaParties

In my kitchen window


Here are some herbs and green onions and lettuce I have growing in my kitchen windowsill. I took ordinary jars and spray painted them white, I should have drilled holes in the bottom. I wrapped them in green tulle so cute. I placed rocks in the bottom and a string. I placed dirt on top of that and pulled the string up through the dirt and put my plant starts on top of that. When I water them whatever falls to the bottom will be pulled up into the dirt by the string whenever the dirt dries out.
In the second picture I have some green onions in just a plain clear jar wrapped in the same tulle. Did you know you can regrow green onions you buy at the store? Just cut of the tops and place the bottoms in water. They will regrow the tops and you can use them over and over. You need to change the water and trim the roots about once a week and rinse the bottoms.
You can also regrow romaine lettuce. http://threepsandq.wordpress.com/2011/12/11/peculiarities-and-plants-romaine-lettuce/ And the planters I put them in: http://skruben.blogspot.com/2012/03/how-to-self-watering-seed-starter-pots.html
I don't have them growing right now but regrowing other things like celery and garlic chives are also possible: http://chickensintheroad.com/farm-bell-recipes/re-growing-celery/ and http://simpledailyrecipes.com/8594/how-to-grow-your-own-garlic-chives/

Thanks to all the other bloggers out there who make my life better and to pinterest for helping me find those bloggers :)

Thursday, February 23, 2012

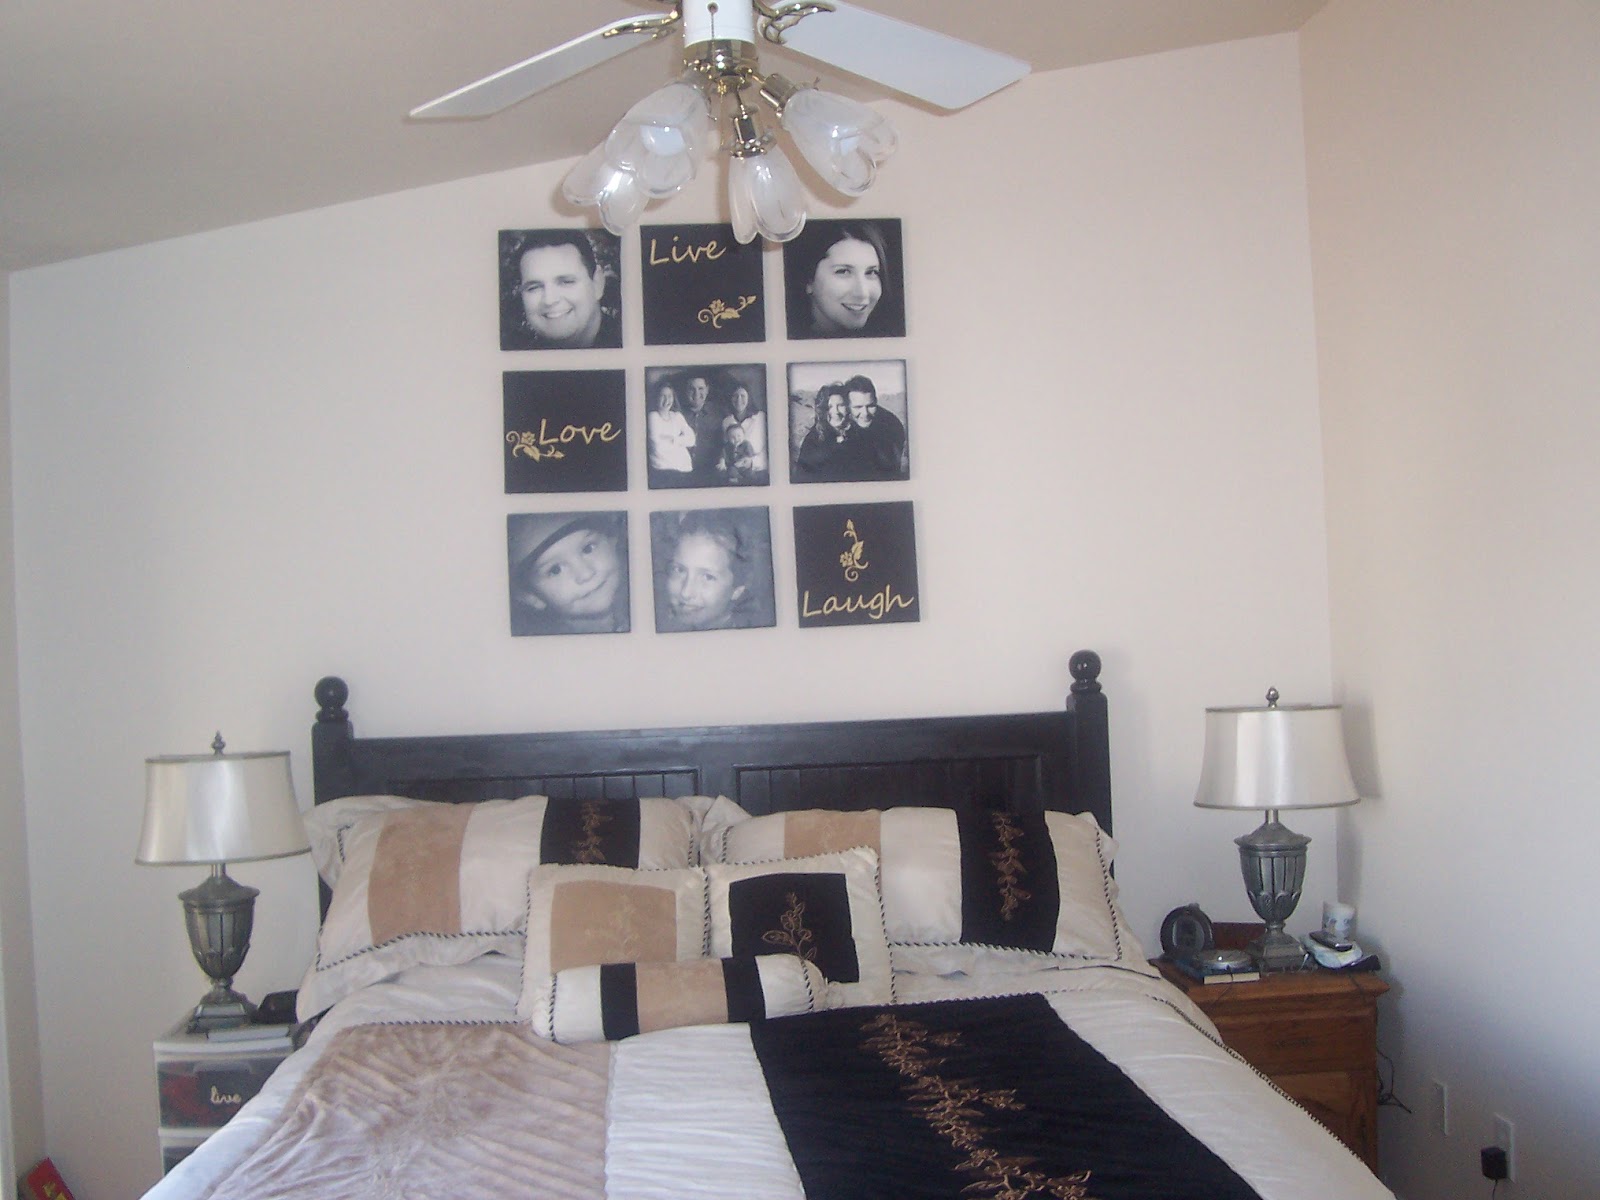
My Room Finally!!!


I love these pictures!! This was really an easy project. I got the Idea from a lot of different blogs on pinterest. I combined my favorites.
First I edited all the pictures just the way I wanted them, black and white, shadowed edges, and softened. I took them to the local printing store. I wanted them 12 x 12 but I had to have them printed on a page that was 12x20ish (12xsomething) of plain no frills paper or something like that. They had to re-size the pictures to allow for a 1/4 inch around each side and one side of the paper was a waste of blankness I cut off no biggie :) They only cost about 40 cents each!!
Then I went to Home Depot and bought two 24x48 pieces of insulation Styrofoam board around $8 each. I had most of one board left for a future project. I also got a small container of sample paint as dark as they could make it around $3. DO NOT USE SPRAY PAINT ON STYROFOAM IT WILL EAT IT!!! A can of spray on adhesive about $5 this will not eat the board. Other blogs warned me not to use Mod Podge it will wrinkle the paper. A spray can of Krylon Matte Finish to protect the paper (I got this from my Mom so I don't know the price.).
I had the 3 pieces of black scrapbook paper and I cut out the words and flowers with my Cricut and Vinyl that I had on hand. Tip: DO NOT BUY Cricut brand vinyl it's a rip off! I can get two 12x24 inch sheets of vinyl for $3 from my local sign and banner store in a much larger variety verses two 12x24 inch sheets of vinyl for $9 from the craft store of Cricut brand.... I have also gotten some good deals from E-bay.

Total cost minus the things I had on hand: $30 and I have supplies left over for other crafts!

The process:
1. I cut the foam in 12x12 pieces with a wood burning kit with an exacto knife blade attachment. Warning: This causes toxic fumes. I have read that others used box cutters.
2. I painted the edges of the foam and just the edges of the front and back with a small foam brush and let them dry.
3. I cut out the photos.
4. I sprayed on the spray adhesive directly to the foam. It doesn't dry completely clear so do get it on anywhere that is going to show. I carefully added the photos and scrapbook papers.
 5. This is where you would put on the protective matte finish I haven't put mine on yet I just got it.
6. I let that sit over night in the garage so we didn't gag on the paint fumes.
7. I added the vinyl lettering and hung them with just small nails.

If you don't like the way your edges came out I have seen others use Ribbon instead of paint. Or covering the whole piece of Styrofoam in black fabric. 

I love it!!!

Here are a few links that helped me out:
http://www.flickr.com/photos/tammywatson/4108464206/in/gallery-21611665@N04-72157625840887538/
http://alittlemcd.blogspot.com/2010_09_01_archive.html
http://crib-tales.blogspot.com/2010/03/thrifty-canvases.html
http://www.sugarbeecrafts.com/2012/01/giant-picture-tutorial.html?utm_source=feedburner&utm_medium=email&utm_campaign=Feed%253A+SugarBeeCraftsSewingRecipesCraftsPhotoTipsAndMore+%2528Sugar+Bee+Crafts%253A+sewing%252C+recipes%252C+crafts%252C+photo+tips%252C+and+more%2521%2529

Kitchen Valance part 2


So I thought I might cover this valance in the same fabric as the one in my Kitchen to match but the blinds are off white and the fabric is Black and white so I thought it might clash. Instead I got creative! I found a pic of the original fabric online. I edited out all the little parts of the pattern because they were too small to work with the cricut. I cut out the pattern in 4 sections of black vinyl and applied them to the valance the blinds came with. I love it! it really pops in my dining room and is unique :)

Kitchen Valance part 1


Can I just say if you are not on Pinterest you should be!
Here is where I got the idea and she has step by step photographs.
http://budgetwisehome.com/how-to-make-a-window-valance/
I did mine a little differently. The foam board I got at the dollar store!! I needed 2 pieces. I love this fabric!
Using my cutting mat and fabric cutter (looks like a pizza cutter) I cut the pieces of foam board to the length I needed them. The whole length of one is actually two pieces taped together. You cant see it from the pictures but in the middle of each valance there is a little divot. I traced a cup on one corner of each cut out and put them together. I didn't use batting like the gal in the link did. I mod podged the heck out of these to glue them to the board. connected the corners with little L brackets and tiny screws that don't quite go all the way through. I hung them to the wall with picture hangers and T pins. I love them!!

Spring Wreath

I copied this from another pintrester.
http://www.duitang.com/people/mblog/17378736/detail/
I did do a couple of things different to make it cheaper. I used a wicker wreath I picked up at the dollar store, they didn't have foam ones and the foam ones in other stores cost to much. But the wicker was kinda tricky to put the pins in. I also got the flowers at the dollar store but after it was all said and done I like the variety of my flowers but the look of hers (from a flower ribbon) better. I didn't make the cute little sign "bare feet welcome" and I used a wreath hook instead of ribbon. It didn't turn out perfect but I'm satisfied with it :)

Side table

Easy Peasy.. Scrapbook paper on the inside and vinyl lettering on the outside :)